7 Easy DIY Home Automation Projects for Beginners
Are you looking to make your home smarter without breaking the bank? You can start with simple DIY home automation projects. With a few basic devices, you can enhance your living space significantly.
With devices like Raspberry Pi, Arduino, and ESP8266, you can take your home to the next level of convenience and efficiency. These tools are both affordable and user-friendly, making them perfect for beginners.
Here are 7 DIY automation project ideas to help you begin your journey into a smarter home.
Smart Lighting

Smart lighting is a popular home automation project that allows you to control your lights remotely using your smartphone or voice assistant. By installing smart light bulbs or switches, you can adjust brightness, color, and schedules, creating a personalized lighting experience. Smart lighting can also help you save energy by automatically turning off lights when not in use.
Devices You Need:
- Smart light bulbs or smart switches
- Smartphone or tablet
- Wi-Fi router
How to do:
- Choose the smart light bulbs or switches compatible with your home’s existing fixtures and your preferred smart home ecosystem (e.g., Amazon Alexa, Google Home, or Apple HomeKit).
- If using smart switches, turn off the power to the switch at the circuit breaker and remove the old switch. Follow the manufacturer’s wiring instructions to install the new smart switch.
- For smart bulbs, simply replace your existing bulbs with the smart bulbs.
- Download the manufacturer’s app on your smartphone or tablet and follow the setup instructions to connect your smart lighting devices to your Wi-Fi network.
- Customize your lighting settings, schedules, and scenes using the app or your voice assistant.
Automated Blinds or Curtains

Automated blinds or curtains offer a convenient way to control the amount of natural light entering your home. By motorizing your window coverings, you can easily adjust them using a remote, smartphone app, or voice commands. This project can also help improve your home’s energy efficiency by automatically adjusting the blinds based on the time of day or the amount of sunlight entering the room.
Devices You Need:
- Motorized blinds or curtains
- Smartphone or tablet
- Wi-Fi router
- Smart home hub (optional)
How to do:
- Choose motorized blinds or curtains that fit your windows and are compatible with your preferred control method (e.g., remote, smartphone app, or voice assistant).
- Install the motorized blinds or curtains according to the manufacturer’s instructions. This may involve mounting brackets, attaching the motor, and connecting the power supply.
- If using a smart home hub, set up the hub according to the manufacturer’s instructions and ensure it is connected to your Wi-Fi network.
- Download the manufacturer’s app on your smartphone or tablet and follow the setup instructions to connect your motorized blinds or curtains to your Wi-Fi network or smart home hub.
- Customize your blind or curtain settings, schedules, and scenes using the app, remote, or voice assistant.
Smart Thermostat

A smart thermostat is an energy-efficient upgrade to your home’s climate control system. It learns your temperature preferences, allows remote control, and optimizes energy usage. With a smart thermostat, you can easily create schedules, monitor your energy consumption, and ensure a comfortable environment in your home.
Devices You Need:
- Smart thermostat
- Smartphone or tablet
- Wi-Fi router
How to do:
- Choose a smart thermostat that is compatible with your home’s HVAC system and your preferred smart home ecosystem.
- Turn off your HVAC system at the circuit breaker and remove your old thermostat, taking note of the wiring configuration.
- Install the smart thermostat according to the manufacturer’s wiring instructions, ensuring that the wires are connected to the correct terminals.
- Turn your HVAC system back on at the circuit breaker.
- Download the manufacturer’s app on your smartphone or tablet and follow the setup instructions to connect your smart thermostat to your Wi-Fi network.
Smart Doorbell with Camera

A smart doorbell with an integrated camera allows you to see and communicate with visitors at your doorstep, even when you’re away from home. By installing a smart doorbell, you can enhance your home’s security, never miss a visitor, and have peace of mind knowing who is at your door.
Devices You Need:
- Smart doorbell with camera
- Smartphone or tablet
- Wi-Fi router
- Existing doorbell wiring (for wired installation)
How to do:
- Choose a smart doorbell with camera that is compatible with your home’s existing doorbell wiring (if applicable) and your preferred smart home ecosystem.
- Turn off power to your existing doorbell at the circuit breaker.
- Remove your old doorbell and disconnect the wiring.
- Install the smart doorbell according to the manufacturer’s instructions, which may involve attaching a mounting bracket and connecting the wiring.
- If your smart doorbell is battery-powered, insert the batteries according to the manufacturer’s instructions.
- Download the manufacturer’s app on your smartphone or tablet and follow the setup instructions to connect your smart doorbell to your Wi-Fi network.
- Customize your notification settings and configure any additional features, such as motion detection or video storage, using the app.
Voice-Controlled Smart Speaker

A voice-controlled smart speaker allows you to interact with your smart home devices using voice commands. By creating your own smart speaker using a microcontroller, microphone, and speaker components, you can customize its functionality and integrate it with your preferred voice assistant.
Devices You Need:
- Microcontroller (e.g., Raspberry Pi)
- USB microphone
- Speaker
- Wi-Fi dongle (if not built into the microcontroller)
- Voice assistant software (e.g., Amazon Alexa Voice Service, Google Assistant SDK)
How to do:
- Set up your microcontroller according to the manufacturer’s instructions and connect the USB microphone, speaker, and Wi-Fi dongle (if necessary).
- Install the operating system (e.g., Raspbian for Raspberry Pi) on your microcontroller.
- Configure the audio settings on your microcontroller to ensure the microphone and speaker are properly recognized.
- Install and configure the voice assistant software of your choice, following the developer’s guidelines for your specific microcontroller.
- Set up the necessary authentication and permissions for the voice assistant software to access your smart home devices and services.
- Create a custom enclosure for your smart speaker components, ensuring proper ventilation and access to ports.
- Configure your voice assistant’s settings, such as the wake word and linked services, using the companion app on your smartphone or tablet.
RFID-Controlled Smart Lock
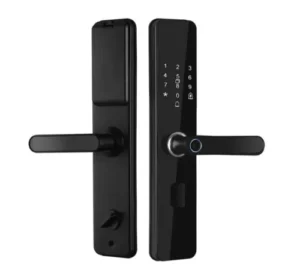
An RFID-controlled smart lock system offers a convenient and secure way to grant access to your home without the need for traditional keys. By using RFID tags or cards, you can easily control who enters your home and monitor access logs.
Devices You Need:
- RFID reader
- Electromagnetic lock
- RFID tags or cards
- Microcontroller (e.g., Arduino)
- Relay module
- Power supply
How to do:
- Connect the RFID reader to the microcontroller, following the manufacturer’s wiring instructions.
- Set up the electromagnetic lock and connect it to the microcontroller using the relay module.
- Write a program for the microcontroller that reads the RFID tags or cards and activates the electromagnetic lock when an authorized tag or card is presented.
- Upload the program to the microcontroller.
- Mount the RFID reader and electromagnetic lock on your door, ensuring proper alignment and secure installation.
- Connect the microcontroller and electromagnetic lock to the power supply.
- Configure the authorized RFID tags or cards by scanning them with the RFID reader and adding their unique IDs to the microcontroller program.

Scott is a husband, father, passionate writer and owner of homeautomationtalks.com and seniorgadgetguide.com. He loves to spend time in the garden, walking in the woods, cooking, is an avid gamer and most of all a tech enthusiast, which makes him the default tech support for his parents. 🙂


